Notes:
- If you are using an older version of the Shopify app, you will need to upgrade before starting to use the default E-commerce events tracking provided by Opensend's Shopify app.
- If you use Klaviyo as your email marketing platform and have already integrated it into your Shopify store, E-commerce events tracking is synced by default using Cookie Sync. In this case, you don't need to use Opensend Shopify events, and you can simply use the standard event tracking between Shopify and Klaviyo for Opensend contacts as well.
E-commerce events tracked by Opensend Shopify app
In our current tracking system, we are tracking the following Shopify events using the Opensend's Shopify app:
- Page_viewed
- Product_viewed
- Collection_viewed
- Product_added_to_cart
- Product_removed_from_cart
- Cart_viewed
- Checkout_started
- Order_created
Events to use from Opensend to correctly map the events in you desired integration
To receive the event tracking information for Contacts through your preferred integration method, follow the correct Opensend mapping for events. Please take note of the following events to use during integration:
- page_view
- view_item
- view_item_list
- add_to_cart
- remove_from_cart
- view_cart
- begin_checkout
- purchase
An example of Integration to receive e-commerce events tracking from the Opensend Shopify app
You can use Other Connections on Opensend to receive a Shopify event for integration. In this example, we will be integrating Opensend to a Custom Webhook to receive data for contacts triggering an add_to_cart event on Shopify.
- Go to Connections under Integrations
- Click on Enrichment Integration
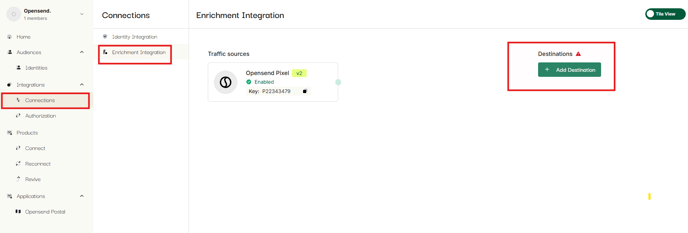
- Click on Add destination and create a new Custom webhook destination and click Next

- Complete the credentials setup for your custom webhook and click Next

- Select the Shopify app as a traffic source and click on Create connections

- Click the Checkbox next to Destination to enable the created connection and click on Publish connection

- After the connection is successfully created between the custom webhook and the Shopify app (the green line should be visible). We need to setup a traffic filter to receive the add_to_cart event to the custom webhook
- Click on the green line that connects the created custom webhook with the Shopify app

- Setup traffic filter so you can receive add_to_cart events to your custom webhook
- In the first dropdown select Event type
- In the second dropdown select „equals“
- In the third dropdown select add_to_cart

- Save changes that were made to the traffic filter
- After making these changes and adding a custom webhook as "Other Connection" with the add_to_cart filter, when the Opensend contact adds something to the cart on your Shopify page, we will deliver the email along with selected additional fields to your Custom webhook.